Tutorial:Square Region Images
|
|
This article is a tutorial It was originally written by Dedgren, and retrieved from SimCity 4 Devotion. This tutorial has been automatically protected because it is considered to be finished. You can suggest changes in the Tutorial Requests and Suggestions article. |
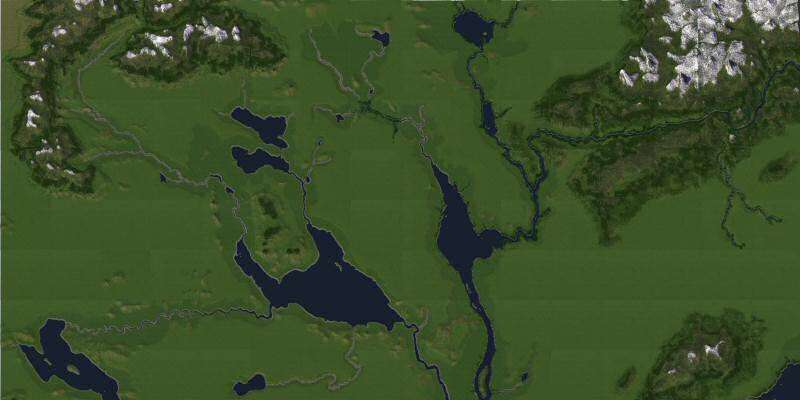
This is the output we'll be creating in the following tutorial.
http://img282.imageshack.us/img282/3994/3rr1620612213072thzv8.jpg
http://img327.imageshack.us/img327/6606/3rr1620612213072bhmp5.jpg
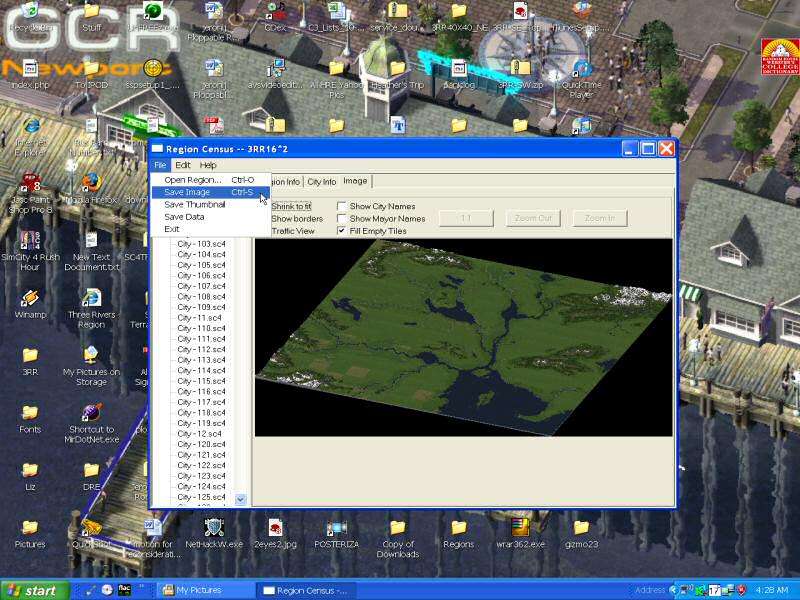
The first step is to open the region you wish to make a square map of in Region Census ("RC"). RC is a standalone utility created by sawtooth1178 that can be <a linkindex="45" href="http://sc4devotion.com/csxlex/lex_filedesc.php?lotGET=913" target="_blank">downloaded here from the LEX [linkie]</a>.
Once the region is open and displaying, select the "Save Image" menu choice from the "Edit" menu.
http://img85.imageshack.us/img85/8544/smt01pj5.jpg
When the "Save file as" dialog box opens, navigate to where you want the file (i.e. a place where you can find it later on- you'll need it) and give the file a unique name. The filetype default is to *.png- I don't change this as it produced great results as far as I'm concerned.
http://img327.imageshack.us/img327/1061/smt02fc1.jpg
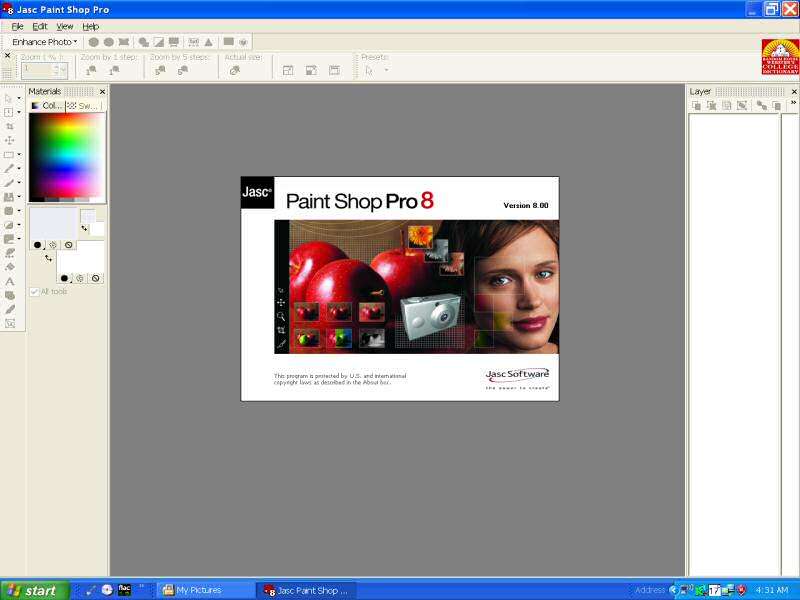
Next, open your graphics program. In case you can't tell, I use an older, but beloved version of Paint Shop Pro ("PSP"). The steps I'll describe are specific to that program, but counterpart menu choices and tools should be in pretty much every full-featured graphics editing program out there.
http://img282.imageshack.us/img282/6536/smt03th5.jpg
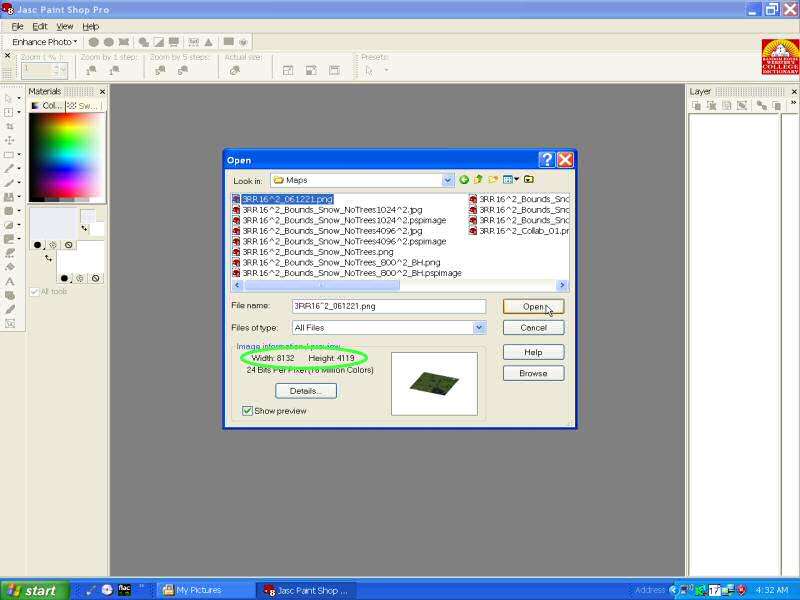
Open the file you just created in RC...
...now, where'd I put the darned thing.
Note that it's quite large. This gives you great detail, but might present a challenge if your computer is short on either processing speed or memory.
http://img72.imageshack.us/img72/4274/smt04hr5.jpg
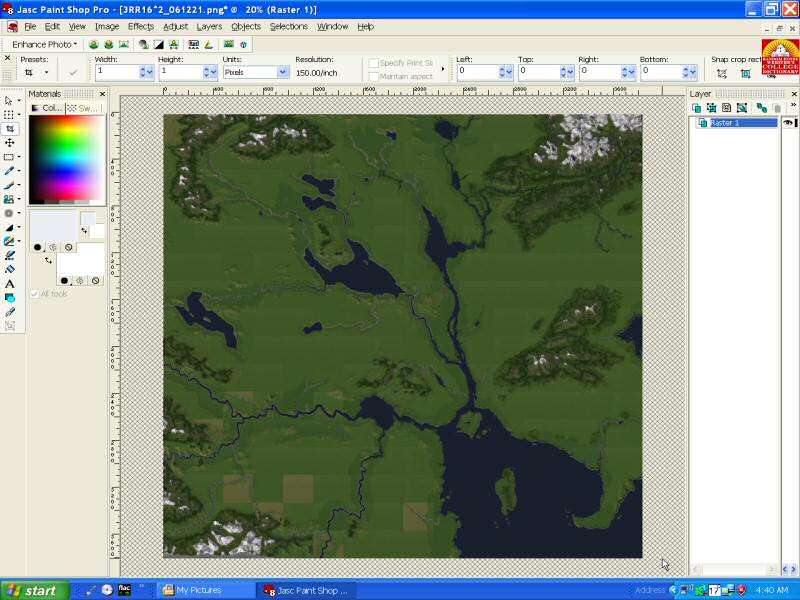
Once the file is open, you'll have output that looks like this- the standard "squashed rectangle" region view. Notice that on my computer the image is displaying at 10% of full size. This is one huge puppy of a region pic.
http://img185.imageshack.us/img185/7236/smt05kv4.jpg
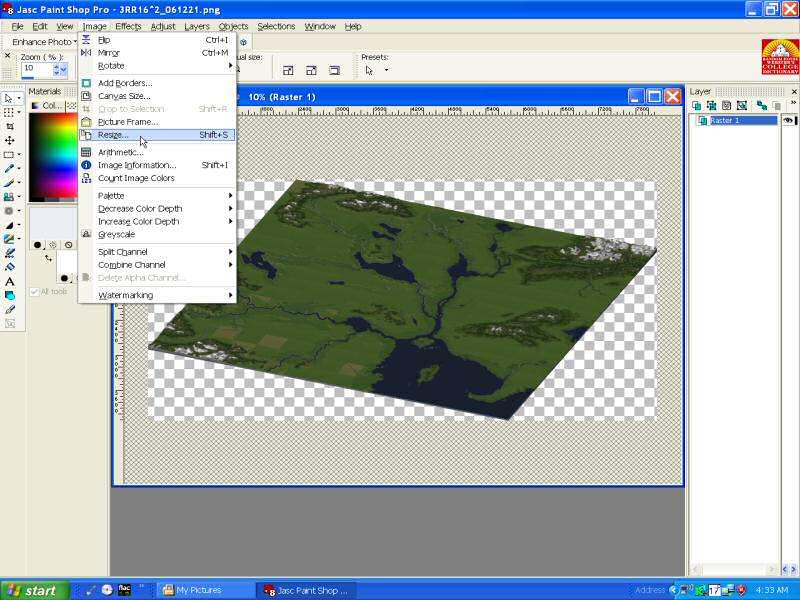
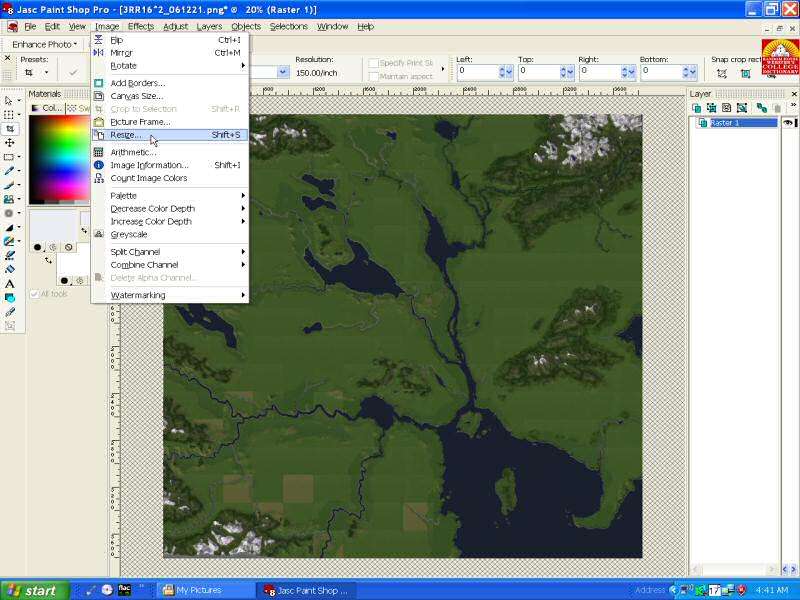
Navigate to the "Resize" menu selection of the "Image" menu and select it. If you use PSP, you can press [ Shift ] and [ S ] to go straight there.
http://img282.imageshack.us/img282/3593/smt06cy7.jpg
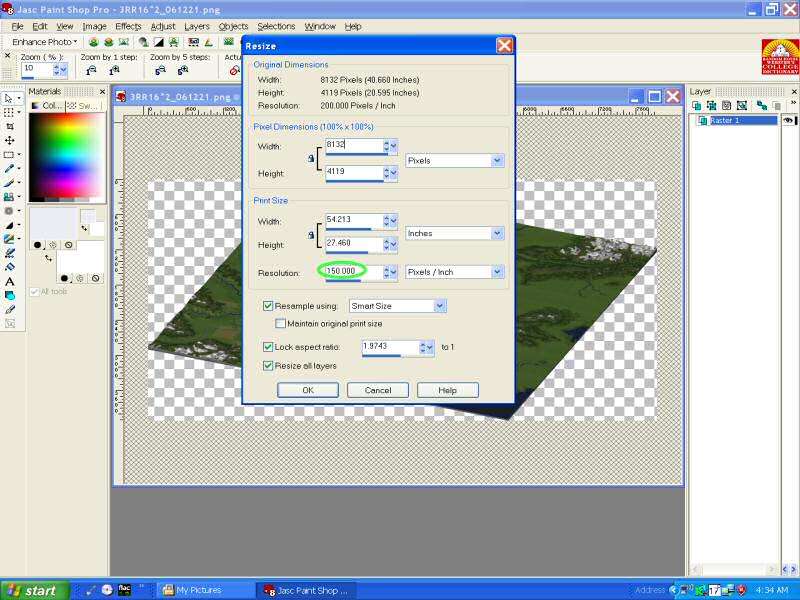
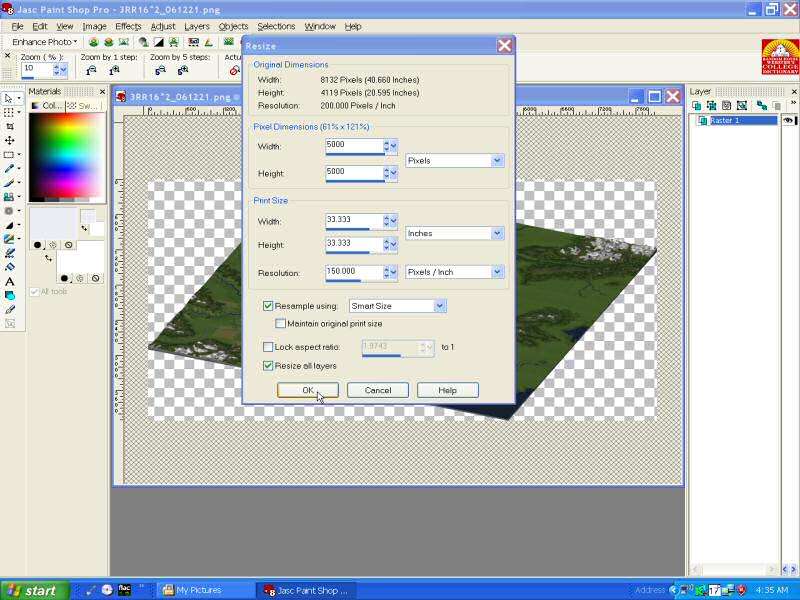
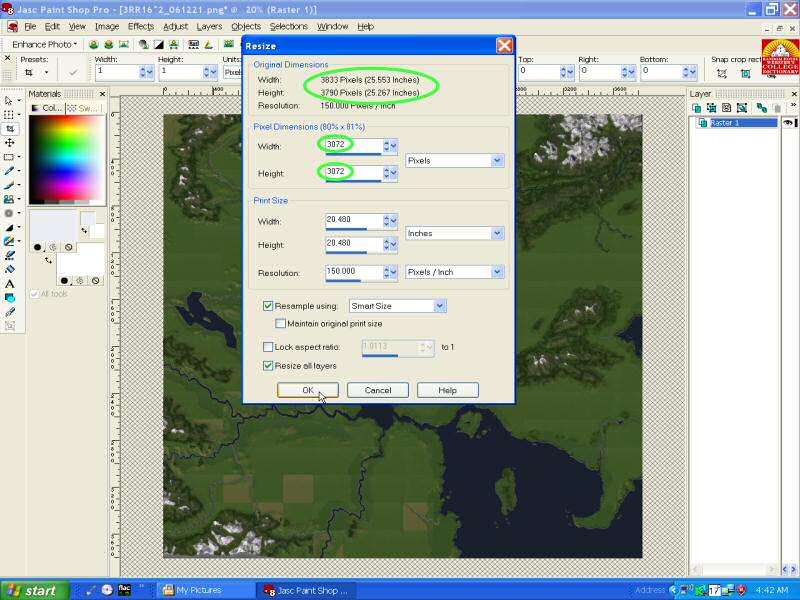
In the "Resize" dialog box that appears, first set the image resolution to the pixels per inc you use. Everything on 3RR is always 150 ppi.
http://img185.imageshack.us/img185/4854/smt07lr4.jpg
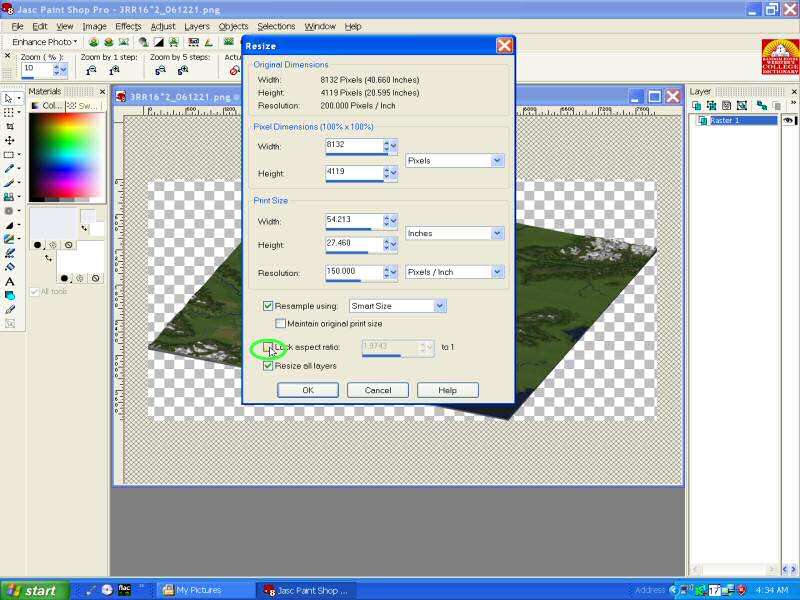
Next, uncheck the "Lock aspect ratio" checkbox. This allows you to set height and width independent of eachother.
http://img216.imageshack.us/img216/5122/smt08sf1.jpg
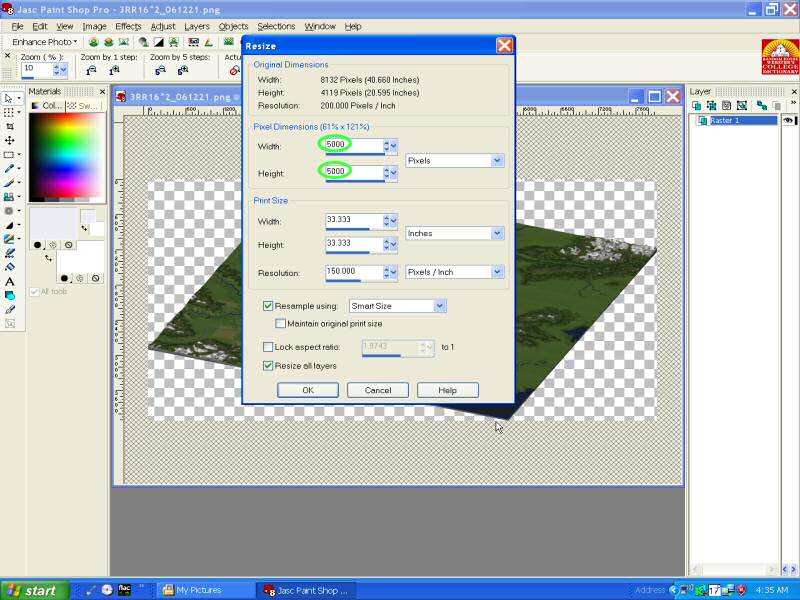
Set height and width of the image to be output at the same number of pixels. I use a round number about 60% of the original image size- it gives me good results. If you don't like what you get, you are free to experiment here- just remember that the height and width must be the same.
http://img116.imageshack.us/img116/3176/smt09vh0.jpg
Click the dialog box's "OK" but to create the modified image.
http://img185.imageshack.us/img185/9733/smt10ji0.jpg
Here's what you get...
...hey, it's a square tipped up on one side! how'd you do that?
I dunno- computers...aren't they a wonderful thing?
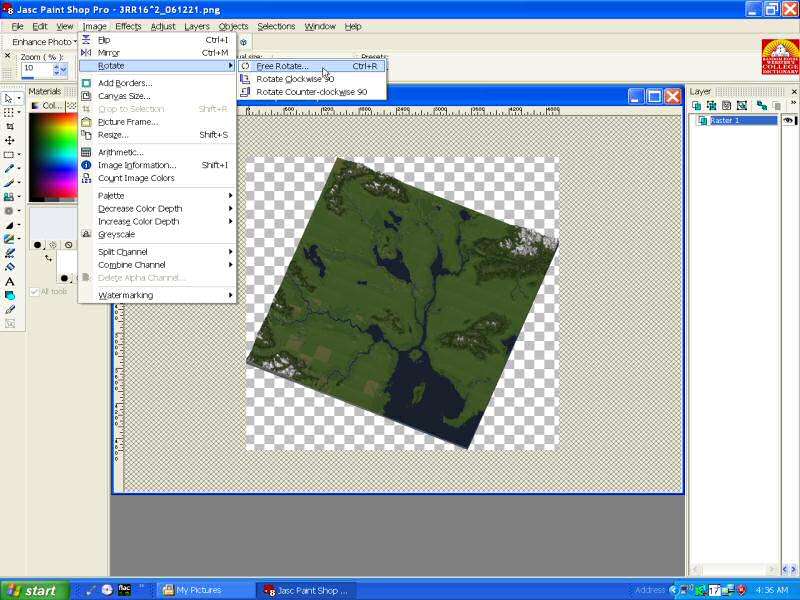
http://img510.imageshack.us/img510/6073/smt11dr7.jpg
For the next step, we'll return to the "Image" menubar choice and select "Rotate" from the menu that drops down. This, in PSP, creates a popout submenu offering the choice to either select free rotation of the image or fixed 90 degree rotation either clockwise or counter-clockwise. We'll select "Free Rotate." If you use PSP, you can go straight to that submenu choice by pressing the [ Ctrl ] and [ R ] keys.
http://img19.imageshack.us/img19/6382/smt12wt1.jpg
On the "Free Rotate" dialog box that appears, select "Left" (counter-clockwise) and then type the number 22.6 into the "Free" text field. This means, in sum, that you'll be rotating your image 22.6 degrees counter-clockwise. This number of degrees should be the same in any graphics program- I say this based on much trial and error on my part in arriving at it.
Click "OK" to do the rotation.
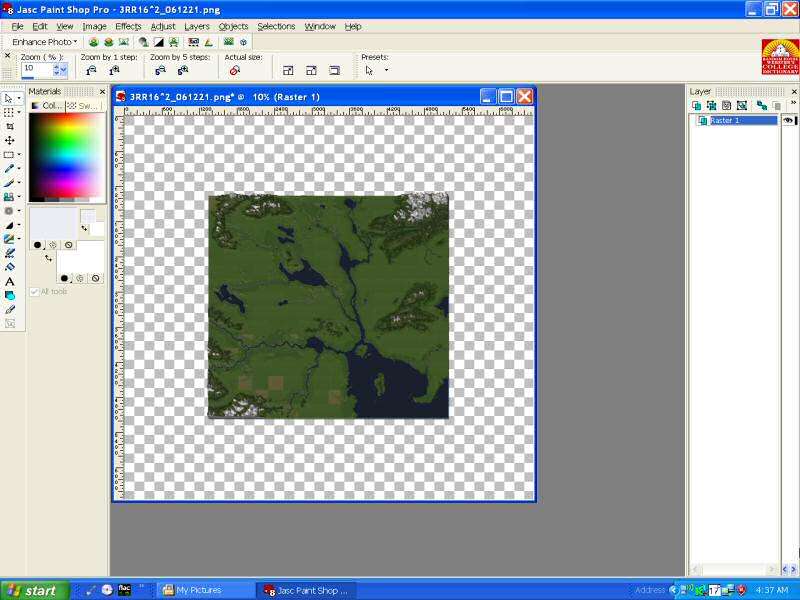
http://img475.imageshack.us/img475/1046/smt13ls4.jpg
Your image now looks like this. Square, and aligned with the perpendicular and horizontal planes. But, we're not there yet.
http://img46.imageshack.us/img46/1980/smt14ik3.jpg
On the left side of the PSP work area, we'll select the "Crop" tool from the "Tools" icon menu.
http://img475.imageshack.us/img475/1516/smt15pq8.jpg
We then drag the selection box the tool creates around our image. Note that you'll lose some of the mountains at the top and on the left side that protrude beyond where the edge of the image would be if the region was completely flat. This is a loss, given the nature of RC's output, that is not avoidable.
Click to tooltip in the center of the image to complete the cropping.
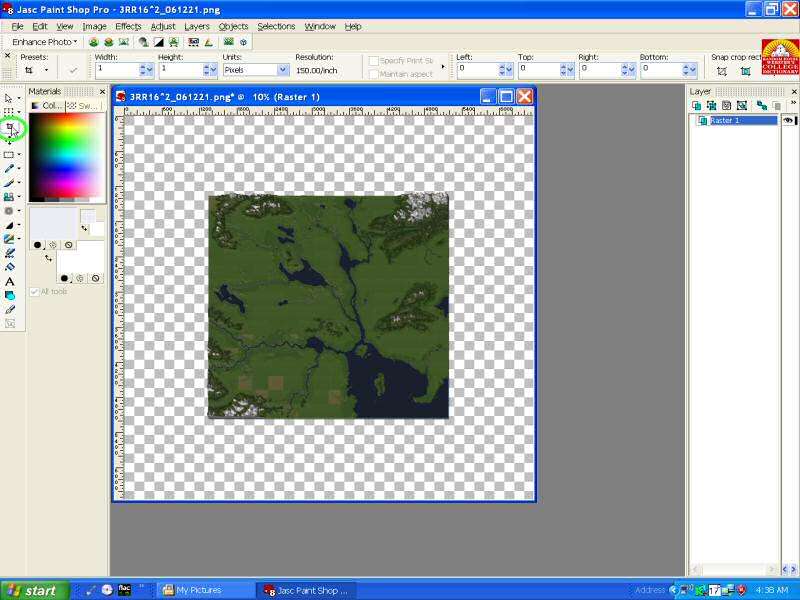
What we now have is a region image that looks like this. Perfectly rectangular...
...but we want perfectly square.
http://img111.imageshack.us/img111/1608/smt16ce2.jpg
One last time, we'll return to the "Image" menu and select "Resize" ([ Shift ] and [ S ]).
http://img19.imageshack.us/img19/3369/smt17sq6.jpg
A glimpse at the original dimensions noted at the top of the dialog box that appears confirms that all we have created so far is a rectangular image. In the "Width" and Height" text fields, type in two identical figures that are the dimensions of the final region image you want to create in pixels. I use the multiple of 1,024 that is closest but still under the smallest of the two original dimensions. Why- well, that's complicated and beyond the scope of this tutorial to fully explain. Suffice it for now to say that doing this allows for accurate scaling between the region grid and the image you are creating. I'll revisit this topic in the future.
...uhh-oh- another promise.
Click "OK." We're almost done.
http://img72.imageshack.us/img72/4783/smt18jd5.jpg
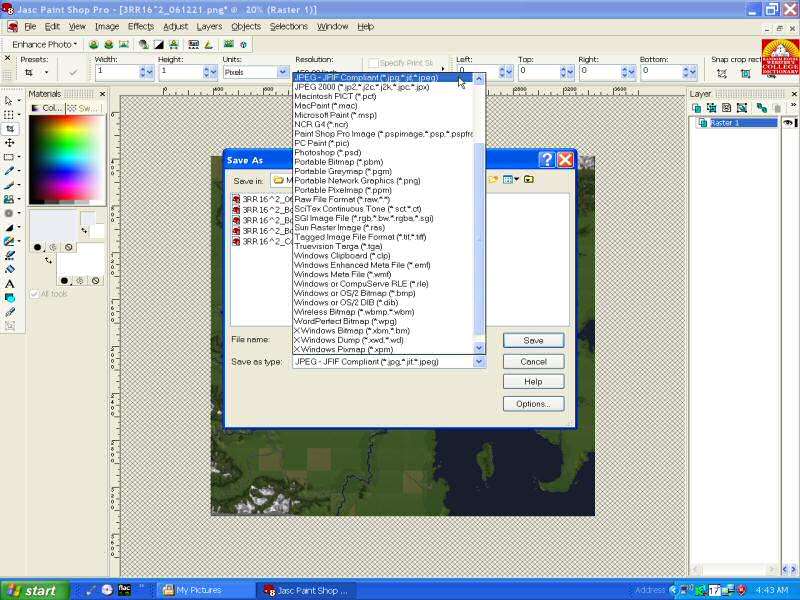
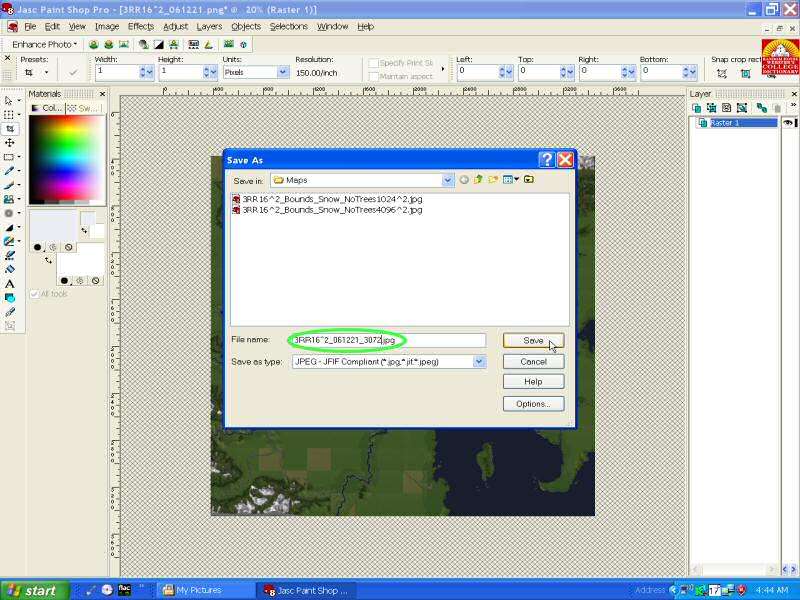
The final step is to save your "square" region image in the output format you want to display it in. If it is purely for your own use, save it in *.png or in your graphics program's native format. If you are going to put it on the web, though, you'll want to use *.jpg format based on image size considerations. That's what we'll do here.
http://img19.imageshack.us/img19/2213/smt19fw8.jpg
Note that you should once again use a unique name for your image, and save it where you can find it...
...that's the voice of experience talking.
http://img116.imageshack.us/img116/9597/smt20ni5.jpg
And you're done. I can do one of these in about three minutes tops, so it's not that hard once you master the steps.
Here's a linkie to the "square" region image we just created.